I'm The Book Binder
- La'la

- Apr 4, 2021
- 4 min read
Updated: Aug 9, 2021
In some of my uni projects last year I made collage art pieces and continued to make more in summer. To be completely honest, though I enjoyed the process a lot, I did not find the outcome exciting as they are a bit too plain and all alike in some ways. Having that in mind and looking for new artistic forms to presenting my work, I chose “Book as Art Object” as one of my subjects this semester. I should say it has been an amazing journey so far and there is a lot of room for implementing ideas.
I started with making a sketchbook and to make that, below materials and tools played their role:
Materials:
Waxed thread (substitute)
Needle
Linen tape
Tarlatan
Awl (substitute)
Piercing cradle or large, non-precious, softcover book(like Yellow page) (substitute)
Buckram/bookbinding cloth (substitute)
2mm - 4mm grayboard/strawboard/book board (different shops call it by different names)
A small strip of 250gsm archival paper
Tools:
Lightweight paper (under 200gsm)
Box cutter/Stanley knife with plenty of blades
Cutting mat
Steel ruler
Acid-free PVA
Sharp pencil
Brush
Bone folder (substitute)
Sharp scissors
Baking paper
Book press, heavy books, or flat weights
Scrap paper (for protecting your surfaces)
Preparing Signatures
A basic yet very important rule in bookmaking is grain in all papers, buckram, grayboard, and tarlatan must be parallel with the spine of the book.

I prepared pages with tearing papers by using a bone folder. First, I tore down the paper into two halves, then I tore down each half into three pieces. At this point, I had six pieces.

By folding each of them, I made a folio and by combining a pair of those, I made a signature/section. In total, I prepared 6 signatures (it is good to have at least 6-8 signatures). I numbered each signature to keep consistency in the pages and put them in the same order.

Next I prepared all my signatures, linen tap and sewing template.

Below is a detail of how to make a sewing template.

I lined the sewing template on the age of the signature’s spine then marked it with a pencil by using a ruler at the right angle (as you can see in the photo).

These are what the marks will look like on the signatures which are right spots for placing sewing stations.

In this stage, because I did not have an Awl, I used a sharp needle instead to punch the stitching template at those holes depicted below. I made sure the holes go through the folds of the signature. I used an old yellow page to put under the signature before punching it.

For this sketchbook, I used French slip and Kettle stitch.

I started with the first signature.


The stitches on the spine turned out neat and tight (hooray! :)

Finally, I finished all the stitches.

Before starting to glue along the spine, I used a bone folder to flatten off the sewing stations. (I used my second sketchbook photo)

In this stage, it was time to glue down the tarlatan. (tarlatan grain must be parallel with the spine)

I wrapped it in baking paper and put it underweight. (I let the glue to dry out)

I trimmed tarlatan and linen tape. My book block was ready to have the cover on.
Casing-In :
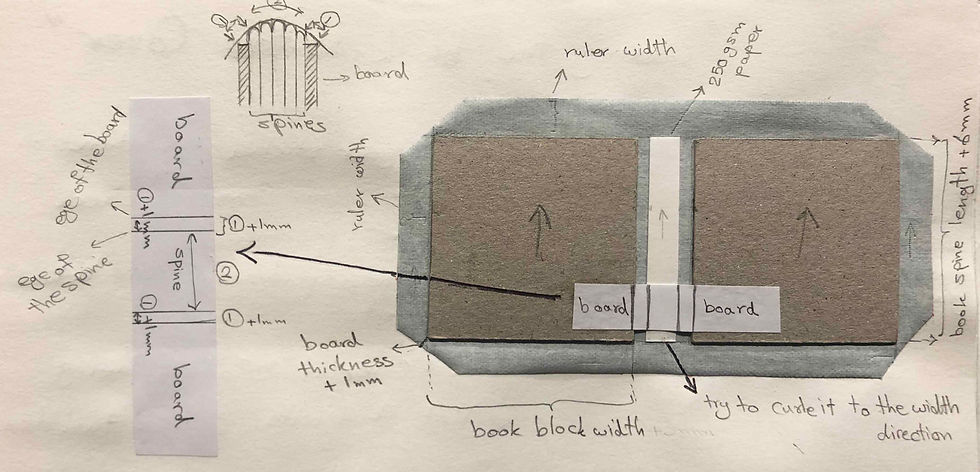
I used this template to measure and prepare the hard case.

I checked the grain of the grayboard (I made sure that the grayboard grain aligns with the spine). I marked that on each board to not forget it.
Cover dimensions = height of page + 6mm x width of pages

Well, It looks good

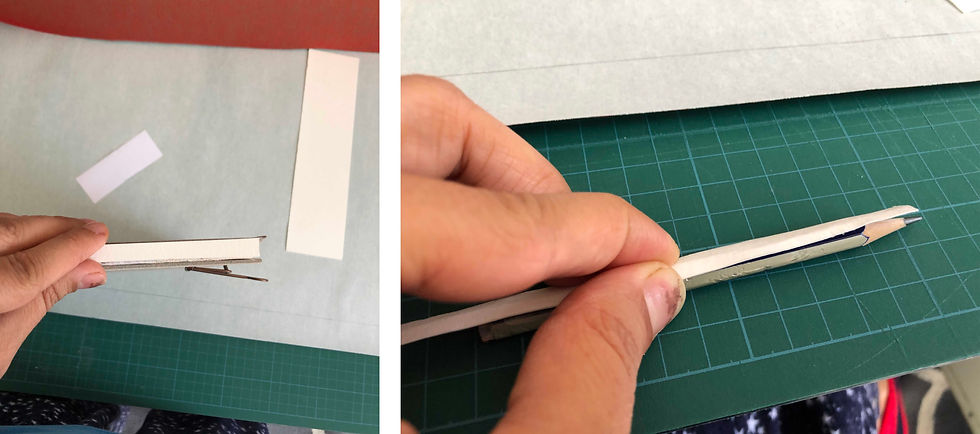
I beveled all corners and edges of the grayboard with sandpaper.

I measured the spine to leave enough gap between the grayboard.
Back to Casing-in template, you can see the external measurement which is the gap between grayboards, and the internal measurements which show width of the spine insert.
For the height, I measured it a little shorter than the height of the book block spine. To make this, I used 250gsm paper. I tried to curl it by wrapping it around a round pencil.

I draw the measurement on the back of the buckram.

I mapped the main lines to place grayboards in the right position. I glued down each grayboard and placed them on the right spot on the back of the buckram.

I wrapped it in baking paper and put it underweight.

I used ruler width as a guide to trim away all excess ages of buckram.
Note: leave a thickness of grayboard+1 mm from each corner.
I trimmed off the corner.

I glued down the spine in between of (middle) two grayboards.

Now it was time to glue down the ends, I started with short edges.
It is important to Press down the corner by the bone folder.

I glued down long edges as well. I used a bone folder to fold it toward the centers. I had to make sure the edges stick to the board completely.

When I finished this stage. I wrapped it in baking paper and put it underweight. (And let it to dry out)

The last part was gluing down the book block to the cover.

I positioned the book block over the book block spine. I kept it at 90 angles as I glued it (keep the glue out of the spine at all times). First, I glued up to the edge of the spine to glue down the tarlatan, after that, I glued down the tapes.

Then, I glued the board up to 3 mm on the edges. I laid down the first page in the position when the book is closed (It is okay to pull it slightly toward the outer edges of the cover). In this stage, I put baking paper between the first and second page and I let it to dry for 20 min before starting to glue down the other side. (I did not want to pull the page out of the position)

I followed the same process for the other sides.

I wrapped it in baking paper and put it underweight.


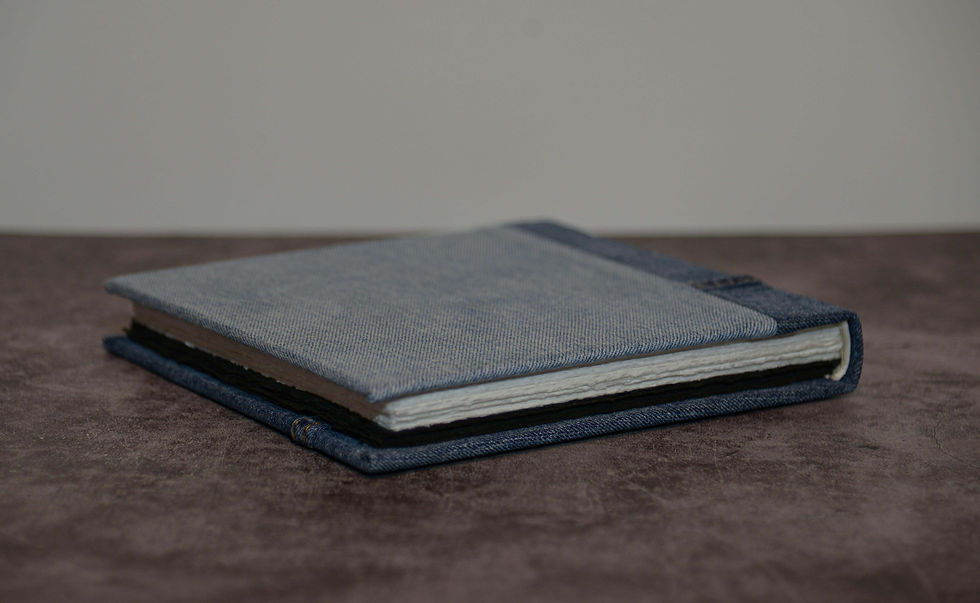
I finished it. This is my first handmade sketchbook. hoorayyyyy!

Below are my second sketchbook photos. In this one, I used my home-made buckram for the cover.

At this time, the only thing that I did differently was using a headband on each side of the book spine.
I love it.


Comments